Cowboy Caviar? Yes Please!

This is not a food blog, but I do, on occasion, post something I find particularly useful or yummy. Cowboy caviar fits the bill. It’s fast, easy, versatile, and most important of all, tasty!

Look at all that color! Do you know what lots of color means? That’s right! Nutrition! Plus you get a major protein boost. Here’s the basic recipe:

Ingredients
1 15oz can black beans (drained and rinsed)
1 15oz can blackeyed peas (drained and rinsed)
1 15oz can sweet corn (drained and rinsed)
1 red pepper (chopped)
1 orange pepper (chopped)
1/2 red onion (chopped)

For Dressing
1/4 cup chopped cilantro (or Italian parsley if cilantro isn’t your thing)
1tsp chili powder
1tsp garlic powder (I use dried minced garlic)
1/4tsp pepper
A Pinch of salt
1/3 cup good Italian dressing (I use Ken’s Steakhouse)

Optional ingredients could be chopped tomato, chopped avocado, chopped olives, it’s kind of like pasta salad because the beans don’t carry much flavor on their own but are fabulous when mixed with other things. If you want a little more heat add a pinch of cayenne or to your taste. You do you.

Instructions
Does that seem like a lot of ingredients? Don’t worry, this comes together in a snap. In measuring cup or small bowl, whisk together dressing ingredients and set aside. Have a milk frother? It’ll work splendidly on emulsifying a salad dressing.

Let your can opener know it’s going to get a little workout, open your canned goods, drain and rinse them, and dump them into a big bowl. Chop up your peppers, onion, and anything else you’ve added to a size that roughly matches the beans and corn. Give everything a good, but gentle toss.

Whisk your dressing one last time and pour over mixture. Gently toss again until you’re satisfied everything has been covered.

You can serve this immediately but I prefer to let it marinate in the fridge for an hour or so. Serve with sturdy, tasty corn chips. It’s dip, it’s a meal, it’s yummy! Enjoy!

This is What You Do with London Broil Leftovers

Like red meat? These recipes build on a fresh, grilled and marinated London Broil. This will easily make three meals for two out of one good sized hunk of steak (about two pounds). “London broil” refers to a method of cooking this tough cut of lean beef that was especially popular from the 1950s through the 1970s as a way to make the inexpensive cut of meat more palatable. This first recipe is the London Broil.

Recipe #1 – London Broil

london broil

Marinade
Ingredients

4 cloves fresh garlic, minced
1/4 cup low-sodium soy sauce
3 tablespoons balsamic vinegar
1 tablespoon extra-virgin olive oil
2 teaspoons dried thyme
1 teaspoon dried oregano
1 2-pound (or so) boneless “London Broil”
1/2 teaspoon salt
1/4 teaspoon freshly ground black pepper

Prep

  1. Tenderize steak with a piercing tenderizer like this one Jaccard Meat Tenderizer (you can us a fork, but it’s way more labor intensive). This is a good time to get out some of that aggression you might have been bottling up.
  2. Combine everything but the salt and pepper with the steak in a large zip-top plastic bag and seal. Marinate in refrigerator at least overnight turning occasionally. Let all those flavors marry and have a splendid honeymoon.
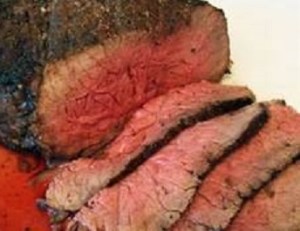
  3. Preheat grill and rub with some olive oil. Grab your steak out of the bag and throw it on the grill about 4-8 minutes per side or until no more than medium rare.
  4. Remove steak from grill and let it rest for about 10 minutes so all those tasty juices can redistribute throughout the meat.
  5. Cut steak into thin strips slicing against the grain.
  6. Reserve about 2/3 of the steak for the next two recipes. It might be hard, but you’ll thank yourself later.

Hint: if you make the garlic butter for the next recipe now, with the London broil, you can serve this with a salad and some garlic bread (remember to get the pre-sliced French bread).

Recipe #2 Open-Faced Steak and Cheese Garlic Bread Sandwiches

Steak Sandwich

Ingredients
1 packet powdered au-jus mix
1 packet brown gravy mix
3 cups water
Leftover London broil (reserve the gravy and half the meat for the 3rd recipe)
4oz cheese, shredded or sliced (can be provolone, mozzarella, or even Monterey jack)
8 slices French bread (from a pre-sliced loaf to help control bread portions)
1 Garlic Butter (recipe below)

Garlic Butter recipe

1 cup softened salted butter (you can use salt free if you’re watching your salt)
2 tablespoons minced fresh garlic (we love garlic, adjust to your preference)
1 tablespoon garlic salt
1 teaspoon Italian seasoning
½ teaspoon fresh ground black pepper
1/3 cup parmesan cheese (not that powdery stuff, don’t skimp)
Sprinkle of paprika

Throw it all in a small mixing bowl and mix until smooth. Do this ahead of time so that the flavors have a chance to mingle and get good an happy together.

Prep

  1. get out your meat (ha, ha) and let it sit and warm up a little.
  2. combine au jus and gravy packets in a sauce pot with the three cups of water and bring to a boil (if you want to get all fancy and make your own, knock yourself out, but this is supposed to be a down and dirty quickie weeknight meal).
  3. once the gravy mixture has come to a boil, reduce heat to simmering and slice your London broil pieces in half twice. Once on lengthwise and once width-wise. Add pieces to the simmering gravy.
  4. Simmer steak in the gravy for about an hour or until steak pieces begin to hold the gravy and become tender. This is how you’re going to make the steak tender enough for sandwiches.

Helpful hint: If you don’t want to eat red meat three times in one week (although the portions are small) you could split the meat and gravy in two and make the second and third recipes at another time. They’re flexible like that.

  1. Slap some garlic butter on those French bread slices and toss them in the oven to toast at 400 degrees for about 20 minutes.
  2. Once the meat is tender, add four strips or so to each slice of toasted bread being careful to reserve half for the next recipe (or not, it’s up to you, these are pretty good saniches).
  3. Sprinkle or add 1 slice of that cheesy goodness on top and return to the oven, turning on the broiler, just long enough to melt the cheese.

This will yield 4 open faced “sandwiches” per person. Plenty. Trust me. I serve this with a Caesar salad or baby greens with a good Italian dressing or homemade vinaigrette.

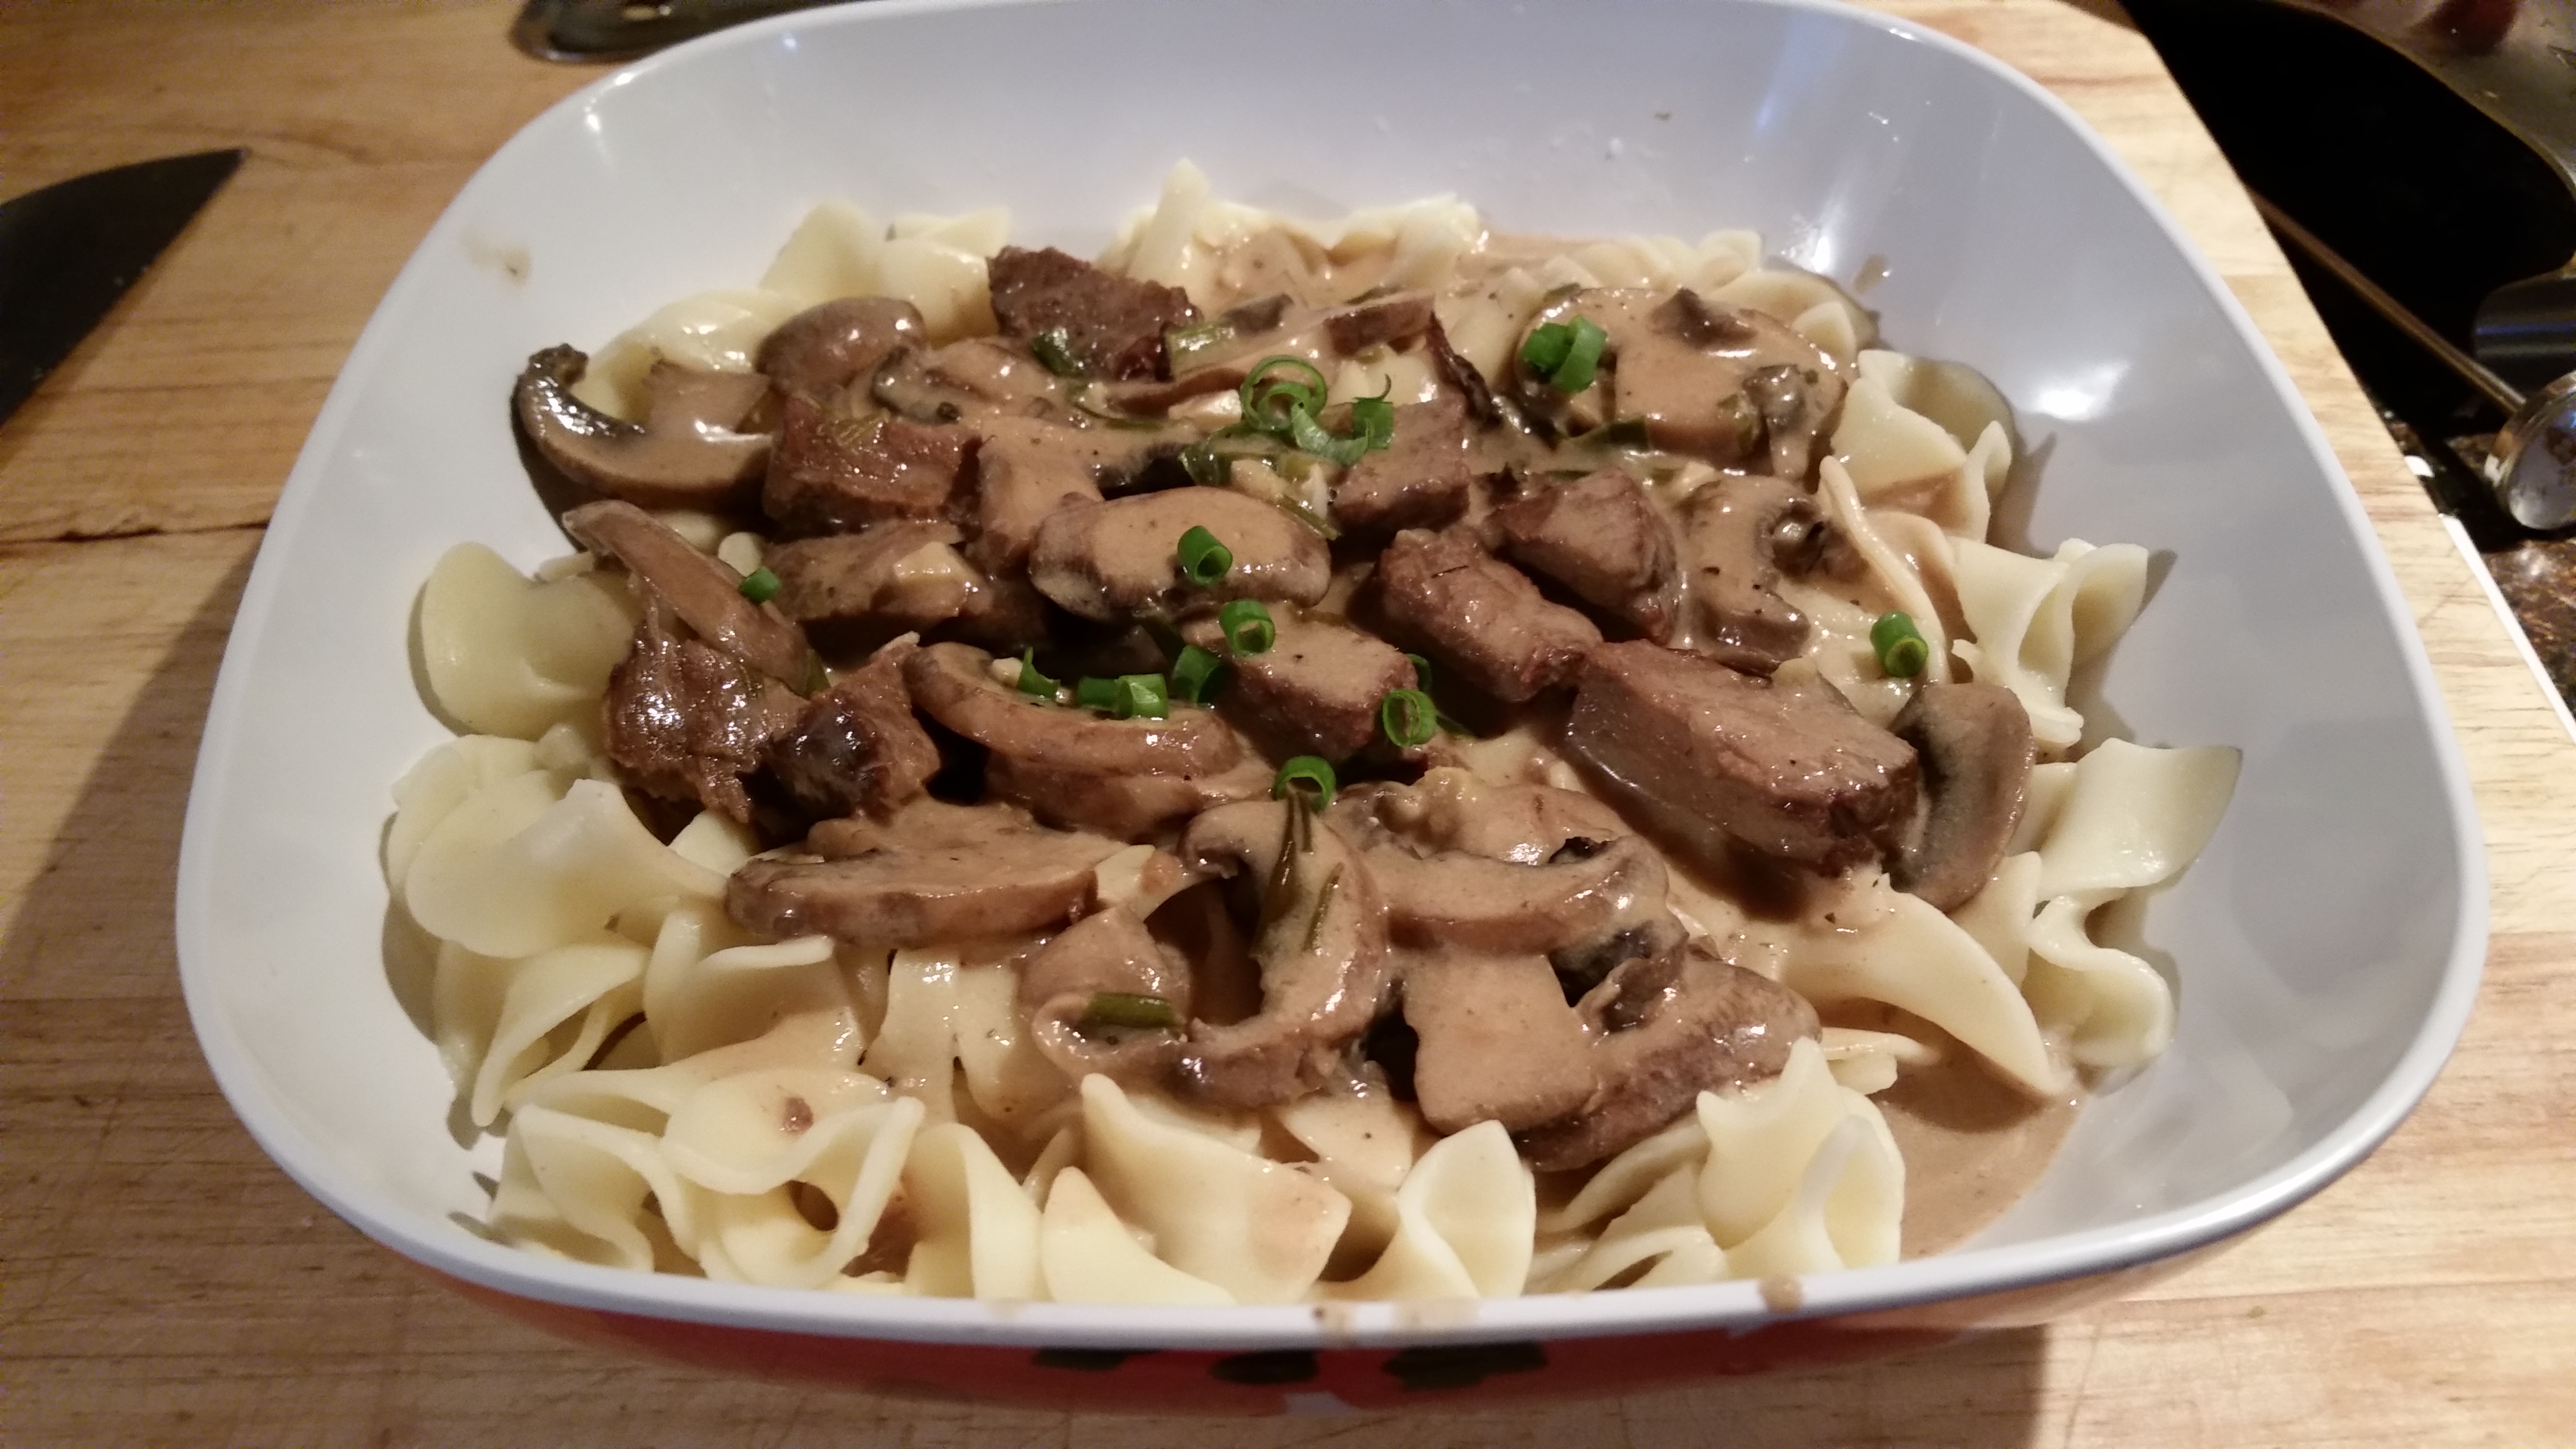
Recipe #3 Beef Stroganof

Serves 4, you can freeze some for later…or not 😉

beef stroganoff

Ingredients
8oz uncooked egg noodles
Last of your London broil
3 fresh green onions, sliced (all of it, not just the green part)
8oz of fresh mushrooms (I use baby Portobello)
8oz sour cream
1 teaspoon minced fresh garlic
¼ teaspoon salt
¼ teaspoon freshly ground black pepper

Prep

  1. cook noodles as directed on package without added salt or fat
  2. while noodles are cooking, sauté onions, garlic, and mushrooms in a nonstick pan until mushrooms and garlic are tender and browned a bit. Add salt and pepper.
  3. add gravy and meat mixture to the mushrooms and onion and warm through until it comes to a boil. Thicken if needed with a thick flour and water mixture (add slowly and stir constantly to avoid lumps and/or over thickening). Turn down to a simmer and add the sour cream, stirring thoroughly.
  4. Serve over cooked and drained egg noodles.

Serve this with a green salad with cut up veggies in it like broccoli, carrots, snap peas, and red peppers.

Since the carbohydrates in these recipes are fairly low and controllable they are all diabetic friendly. Each is accompanied by a salad by design because in most diets, well, salads and veggies are free, and filling, and good for you! You do have to count the dressing, though. Awwwwww! Drat!

NOTE: To clear up any confusion, these recipes originate from one, single, grilled London broil. Each recipe builds upon the last giving your three different meals for the week.

If you get a chance to try these recipes please let me know how they turned out for you. If you have a “London Broil Leftover” recipe to share, please feel free!

No Pain Lo Mein

I have faithfully (or perhaps brazenly) reproduced Rachel Ray’s yummy version of this recipe here (don’t send me hate messages that she’s not a “real chef”, because I don’t care). It’s one of my favorite recipes because it’s so versatile. There are so many things you can put into this recipe, pineapple, broccoli, cauliflower, the list goes on and on. It’s almost one of those “whatever is in the fridge recipes”. You could also add meat, shrimp, scallops, or tofu. I’ve used spaghetti noodles to make this and it was terrific! I use a large electric skillet to make this since I don’t own a wok and find that it works well. I tend to use less noodles to cut down on the carbs.

2 tablespoons (2 turns around the pan in a slow drizzle) vegetable or wok oil

1 cup (2 handfuls) snow peas, halved on a diagonal

1 red bell pepper, seeded and cut into match stick size pieces

1/2 pound assorted mushrooms (shiitake, straw, enoki, or oyster), coarsely chopped, if necessary

 4 scallions, thinly sliced on a diagonal

2 cups (about 4 handfuls) fresh bean spouts

2 inches fresh ginger root, minced or grated with hand grater

4 cloves garlic, minced

1 pound lo mein noodles or thin spaghetti, cooked to al dente and drained well

1/2 cup aged tamari soy sauce

1 tablespoon toasted sesame oil, several drops

 Heat a wok-shaped skillet or large non-stick skillet over high heat. When pan is very hot, add oil, (it will smoke a bit) then, immediately add the snow peas, pepper, mushrooms, scallions, and bean sprouts. Stir fry for 1 minute to flavor the oil, then add the ginger and garlic, and stir-fry 2 minutes. Add the cooked noodles and toss with to combine. Add the soy sauce and toss the ingredients to coat noodles evenly with sauce. Transfer the lo mein to a serving platter and garnish with a drizzle of toasted sesame oil.

YUM!

Comfort Food – Chipped Beef on Toast

Ahhh, comfort food. As I was indulging in making myself a breakfast of chipped beef on toast this morning I started wondering about comfort food. Why do we seek it? Which foods are comfort foods to whom? Why do they make us feel so good? Why are they so vilified by modern diet gurus and dieticians alike? I began sifting through all the things I’d heard, read, and saw about comfort food over the years.

Why do we seek comfort food? The answer is simple and yet quite complicated. We seek comfort food to feel better or to celebrate feeling good. Women do more of the former, and men do more of the latter. Comfort food, loosely defined is the kind of food that makes us wax nostalgic, or is connected to something or someone we are sentimental about. It’s simple to prepare and usually high in calories and or nutrients. Mom’s macaroni and cheese, for example (and I’m not talking about that stuff in the blue box at the supermarket). If this is true, the yearning for comfort food stems from a complicated psychological process in which the food itself, usually high in carbs and calories, causes a certain reaction in the brain that gives us a feeling of comfort and warmth. 

I snooped around the internet for some lists of comfort foods. Of course these foods vary from culture to culture. In the U.S. the list includes apple pie, mac and cheese, and fried chicken (chipped beef on toast was not on any list I saw). British comfort foods include bangers and mash, fish and chips, and chocolate cake, Indonesia – fried banana, in Canada – poutine, fries, gravy, and some old cheese, or so I’ve gathered from National Geographic, among other internet sources. 

So how do we reconcile our beloved comfort foods with our modern understanding of dietary needs and recommendations? There are a few ways of doing this. One, avoid comfort food altogether. It makes you feel good, and let’s face it, anything that makes you feel good is either going to give you cancer or make you fat. Two, indulge occasionally. A hearty bowl of home-made mac and cheese every now and again isn’t going to kill you. Three, indulge whenever you like, but keep the portions small and reasonable and balance it with healthy foods such as salads. Think of a dinner plate full of salad with a side of spaghetti that is about the size of a deck of playing cards. Option three works especially well if you eat all the salad first then continue on to the comfort food.

So in the name of comfort food lovers everywhere, I humbly submit my recipe for chipped beef on toast; one of my favorite comfort foods right up there with home-made mac and cheese and chili.

¼ cup butter

¼  cup flour

¼ tsp pepper

1 – 2 dashes cayenne pepper (more if you like it spicy)

2 cups milk

8 pieces of toast (buttered)

1 container dried beef

Melt butter in saucepan. Add flour, pepper, and cayenne and cook until mixture slightly browns. Slowly add milk whisking vigorously to avoid lumps. Briefly bring to a boil, stirring frequently until sauce begins to thicken then turn heat to low.

Cut dried beef into ribbons or small chuncks (recommended for children). Start toast.

Stir dried beef into sauce. Butter toast, place desired number of toast pieces on a plate and spoon sauce over them and enjoy!

In the tradition of option number three for the healthy eating of comfort food, this recipe would be 8 servings. In our house, we usually opt for option number two which would make this recipe more like 2 servings. However, the recipe is easily expanded to feed more. Would love to give you a picture, but the camera is having difficulties. I am working on them.

Easy Creamy Lemonade Pie

It’s recipe day! This is a refreshing frozen pie I serve in the late spring/summer months. It’s easy, tangy, sweet, creamy, dense and very rich. I always have to make two because it disappears so fast. This recipe makes one, 9” deep dish pie. I think the original base for this recipe called for a pretzel crust, but I’m really not fond of pretzels so I make mine on a graham cracker crust. Feel free to try the pretzel crust and please tell me what you think if you do. Enjoy!

Easy Creamy Lemonade Pie

1 ½ cup graham cracker crumbs                                                                                      ¼ cup sugar                                                                                                                       ½ cup butter (melted)                                                                                                        ½ gallon vanilla ice cream (softened)                                                                                 1 12oz can frozen lemonade concentrate                                                                  Yellow food coloring (optional for lemony color)                                                                ½ tsp lemon zest

Crust                                                                                                                       Combine graham cracker crumbs, melted butter, and sugar. Press mixture into 9” deep dish pie pan and chill while making the filling.

Filling                                                                                                                              Mix soft ice cream, lemonade concentrate, lemon zest, and 4-6 drops of yellow food coloring (optional) until smooth. Pour filling into crust and freeze for at least 4-6 hours. Let the pie stand at room temperature for 15-20 minutes before serving. Garnish for presentation with anything from lemon slices, lemon curls, or lemon candies to sliced or whole berries and a sprig of mint.

Try making the pink lemonade version for a baby girl shower, or any kind of ladies meeting. Just substitute pink lemonade and pink food coloring (optional).

What’s your favorite spring/summer dessert recipe?