Easy Over Easy Eggs

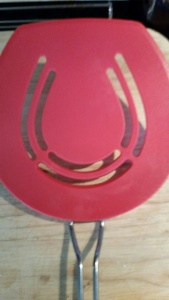
Tired of trying to flip over-easy eggs in the pan with a spatula or tossing them in the air hoping that they all end up in the pan and the yolks don’t break? Simple as 1, 2, 3. The secret is medium heat and a pancake turner.

Today I’d like to talk about eggs. My favorite type of eggs, actually. Over easy.

Over easy eggs have two crucial characteristics. 1. The egg whites are tender but done. 2. The yolks are runny so that they can make a yummy sauce for toast, hash browns, grits, whatever you like. However, making great over easy eggs can be a challenge so if I’m feeling particularly challenged, as I am on most mornings, I can use this handy hack.

20150429_103134_resized

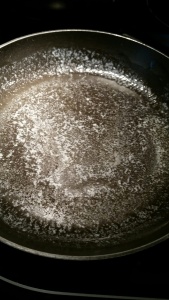
  1. Don’t skimp on the cooking fat (EVOO, coconut oil, butter, whatever) and use a small frying pan over medium heat. Mmmmmmm… melty butter.

Pancake turner

  1. When the egg white is mostly solidified, slide the eggs out of pan onto a large pancake turner. Note: I don’t have a fancy schmancy tripod, so no pictures of action scenes. They’re pretty self explanatory anyway.

20150429_102454_resized

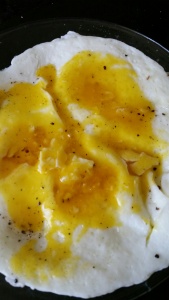
  1. Hold pan inverted over pancake turner and gently, but quickly turn eggs back into the pan (do this over a plate or paper towel to catch any drippings from pan). Cook for just a minute or two to finish the whites.

20150429_102623_resized
20150429_102736_resized
No more trying to scoop them up in a spatula and no broken yolks from tossing (although the tossing may impress last night’s date when done right). Voila! You’re welcome. 🙂

What’s your favorite food hack. Let me know in the comments below.

Ode to My Bread Machine

Oh beloved bread machine, where would I be without you. Slaving away half the day making lumps of dough, heating up the entire house with an oven in the summer when heat is the last thing we need. The customized little loaves you yield make my family so happy and I’m happy that their happy and we’re all happy when mom’s happy. <insert sound of record scratching>

Seriously, I think my bread machine is one of the best things since….since…well, since sliced bread. Don’t get me wrong, I’m not against the traditional way of making bread and I have done my share of it and thoroughly enjoy it, but when you have a full-time job plus a myriad of other activities spinning around in your world, making bread the old-fashioned way becomes a rare treat. Then there’s the satisfaction of controlling the ingredients and knowing you’re making something wholesome for your family (if you choose your ingredients wisely). For me, it also means that I can also control the carbohydrates while still allowing the rest of the family to make yummy sandwiches and without paying $9 a loaf for bread. Just using stevia instead of sugar makes a big difference. However you do need one special ingredient, rapid rise bread machine yeast and on a side note, expect to have to experiment with making decent sourdough bread in a bread machine. Expect to end up buying sourdough starter. Breadtopia.com has a great one. Bread dough is also better to use in a bread machine, but not crucial.

Now a little bit about bread machines. There so many on the market and some are better than others. The biggest loaf you’re probably going to get is a 2lb loaf, but beware, you may not be able to find a bag to put it in as it will be a big loaf with slices approximately 4”w x 8”h or so. My bread machine will make a 1lb, 1.5lb, or 2lb loaf. More often than not I will use the 1lb setting because this makes better sandwich bread slices. Why did I bother to buy a machine that can do a 2lb loaf, do you ask? I’ll tell you; because 1lb machines don’t make loafs, they make unruly cubes. Plus, since I can use my machine to make bread dough and bake it off myself (after a final rise outside of the machine) the larger capacity comes in handy when we have guests.

Now that we have sizes down, let’s think about brands. I am on my third bread machine in a little less than a couple of decades and it is by far the best I’ve ever purchased. Good capacity, lots of versatility (it will even make jams, puddings, batter breads, and of course, pizza dough) and good, sturdy construction. My machine is a Breadman Pro breadmaker (pictured above). I got it in a warehouse sale at CHEFS catalog for an undisclosed amount. I adore it. Some other top rated machine brands include Zojirushi, Cuisinart, De Longhi, and Salton. Expect to pay about $100 to $150 USD for a good machine. Your machine will come with an instruction manual and recipes to get you started. From there, it’s easy to find other recipes on the web.

Keep in mind the main difference between baking bread in a machine and baking bread from scratch is that the machine is doing all the work, rising, and baking for you. The best breads start with a good recipe and these are not an exact science due to factors such as humidity, altitude, and quality of ingredients. Also, ingredients should be room temperature and the water should be warm enough to help activate the yeast (about 80˚F). Once you get the hang of it, you can make homemade bread any time you want. A favorite at my house and a big hit as Christmas gifts one year is an Italian herb bread that I got in my first bread machine user guide that I tweaked and kind of made my own. It’s simple enough that a beginner can easily make it. Here’s mine.

Bread Machine Italian Herb Bread – Yield 1-1lb Loaf

Âľ cup + 2 tbsp. water

1-1/2 tbsp. Oil

1 tbsp. Sugar

1 tsp. Salt

1 tbsp. Dry Milk

2-1/4 cup bread flour

1-1/2 tsp. Dried Italian Seasoning

2 cloves of garlic (crushed)

1-1/2 tsp. Active Dry Yeast

Select your machine’s French bread course and hit start. Take a peek after a few minutes to make sure the dough is not too dry or wet. If it is, follow the recommendations in your machines user guide.

Do you have a favorite kitchen machine, gadget, or helper? What makes you so fond of it?

Comfort Food – Chipped Beef on Toast

Ahhh, comfort food. As I was indulging in making myself a breakfast of chipped beef on toast this morning I started wondering about comfort food. Why do we seek it? Which foods are comfort foods to whom? Why do they make us feel so good? Why are they so vilified by modern diet gurus and dieticians alike? I began sifting through all the things I’d heard, read, and saw about comfort food over the years.

Why do we seek comfort food? The answer is simple and yet quite complicated. We seek comfort food to feel better or to celebrate feeling good. Women do more of the former, and men do more of the latter. Comfort food, loosely defined is the kind of food that makes us wax nostalgic, or is connected to something or someone we are sentimental about. It’s simple to prepare and usually high in calories and or nutrients. Mom’s macaroni and cheese, for example (and I’m not talking about that stuff in the blue box at the supermarket). If this is true, the yearning for comfort food stems from a complicated psychological process in which the food itself, usually high in carbs and calories, causes a certain reaction in the brain that gives us a feeling of comfort and warmth. 

I snooped around the internet for some lists of comfort foods. Of course these foods vary from culture to culture. In the U.S. the list includes apple pie, mac and cheese, and fried chicken (chipped beef on toast was not on any list I saw). British comfort foods include bangers and mash, fish and chips, and chocolate cake, Indonesia – fried banana, in Canada – poutine, fries, gravy, and some old cheese, or so I’ve gathered from National Geographic, among other internet sources. 

So how do we reconcile our beloved comfort foods with our modern understanding of dietary needs and recommendations? There are a few ways of doing this. One, avoid comfort food altogether. It makes you feel good, and let’s face it, anything that makes you feel good is either going to give you cancer or make you fat. Two, indulge occasionally. A hearty bowl of home-made mac and cheese every now and again isn’t going to kill you. Three, indulge whenever you like, but keep the portions small and reasonable and balance it with healthy foods such as salads. Think of a dinner plate full of salad with a side of spaghetti that is about the size of a deck of playing cards. Option three works especially well if you eat all the salad first then continue on to the comfort food.

So in the name of comfort food lovers everywhere, I humbly submit my recipe for chipped beef on toast; one of my favorite comfort foods right up there with home-made mac and cheese and chili.

ÂĽ cup butter

¼  cup flour

ÂĽ tsp pepper

1 – 2 dashes cayenne pepper (more if you like it spicy)

2 cups milk

8 pieces of toast (buttered)

1 container dried beef

Melt butter in saucepan. Add flour, pepper, and cayenne and cook until mixture slightly browns. Slowly add milk whisking vigorously to avoid lumps. Briefly bring to a boil, stirring frequently until sauce begins to thicken then turn heat to low.

Cut dried beef into ribbons or small chuncks (recommended for children). Start toast.

Stir dried beef into sauce. Butter toast, place desired number of toast pieces on a plate and spoon sauce over them and enjoy!

In the tradition of option number three for the healthy eating of comfort food, this recipe would be 8 servings. In our house, we usually opt for option number two which would make this recipe more like 2 servings. However, the recipe is easily expanded to feed more. Would love to give you a picture, but the camera is having difficulties. I am working on them.

Chicken and Veggies Alfredo – Quickie Feed-a-Crowd Recipe

Today I’d like to share a total cheater recipe that I threw together. This is one of my “OMG I have to feed an army and I have to do it now????” Recipes. It has pleased a few crowds at my house and easily feeds 10-12 people. If you don’t keep some frozen veggies on hand consider doing so, they come in handy. These are all things I usually have on hand in the freezer and pantry. Don’t panic, it’s not as complicated as it looks.

1 32oz bag mixed frozen veggies of choice

1 package chicken breasts (4 breasts)

1 1lb package of pasta (bowtie, penne, something pretty)

1 jar store bought Alfredo sauce

ÂĽ cup shredded Parmesan/Romano cheese

ÂĽ cup chopped fresh flat leaf parsley

1tsp Herbs de Provence or poultry seasoning

A few pinches of salt for the pasta water and for the chicken

A couple of tablespoons of olive oil

While you’re waiting for you pot to boil (because a watched on never does), combine Herbs de Provence or poultry seasoning, and a pinch or two of salt (you can leave the salt out if you wish) in a small bowl. Squish them around a little to release the flavors. Rinse chicken breasts and pat dry. Drizzle with just a little olive oil, enough to make the herbs stick, then rub the seasoning mixture onto the chicken breasts. Depending on what the weather is like in your neighborhood at the time, you can grill the chicken on the bar-b-que over medium heat or you can roast then in the oven at 400 degrees in a covered dish with a little water in the bottom to keep them moist, or poach them in some chicken stock. Depending on the thickness of the breast, they take about 20 minutes to cook.  

Once your pot has come to a boil add the spaghetti. When you put in the spaghetti add a little salt and put the veggies in the microwave to steam. Warm up the Alfredo sauce in a small pot. Chop parsley. Don’t forget to turn your chicken after 10 minutes if it’s on the barb-e.

Let the chicken cool for 5 minutes to allow the juices to redistribute (otherwise when you cut into it, all the juices will run out and the chicken will be dry). Once cool enough to handle chop into 1”, bite-sized pieces.

Now for the fun part! Throw all the veggies, pasta and chicken into a big, family sized, bowl. Add the Alfredo sauce and toss until well coated. Garnish with a sprinkling of shredded Parmesan/Roman cheese and parsley. Voila! Dinner for an army in 30 minutes!

The most important key to this recipe is timing. If you follow the cooking order, everything should be done at the same time and ready to combine. Don’t be afraid to cook things at the same time. It’s really not as hard as it looks. It just takes a little bit of planning. Make sure you fully cook your poultry to avoid salmonella and other nastys from ruining your meal.

*Note: I live at an altitude of roughly 6,000ft. It takes water a little longer to boil here. I have a good ten minutes even with a covered pot before my water will boil.

How do you feed a crowd in a hurry? Do you have a favorite recipe to accomplish this?